At 9 AM you're on a Zoom call — you want Zoom at 100%, Spotify muted, Slack muted. At 10 AM the call ends — you want Spotify at 40%, Slack at 15%, Zoom doesn't matter. At noon you're gaming — game at 60%, Discord at 100%, everything else muted. By 6 PM you're watching YouTube — browser at 80%, everything else quiet.
Every situation has a different ideal volume configuration. And every time the situation changes, you'd have to adjust five or six apps manually. Or you could save each setup as a profile and switch with one click.
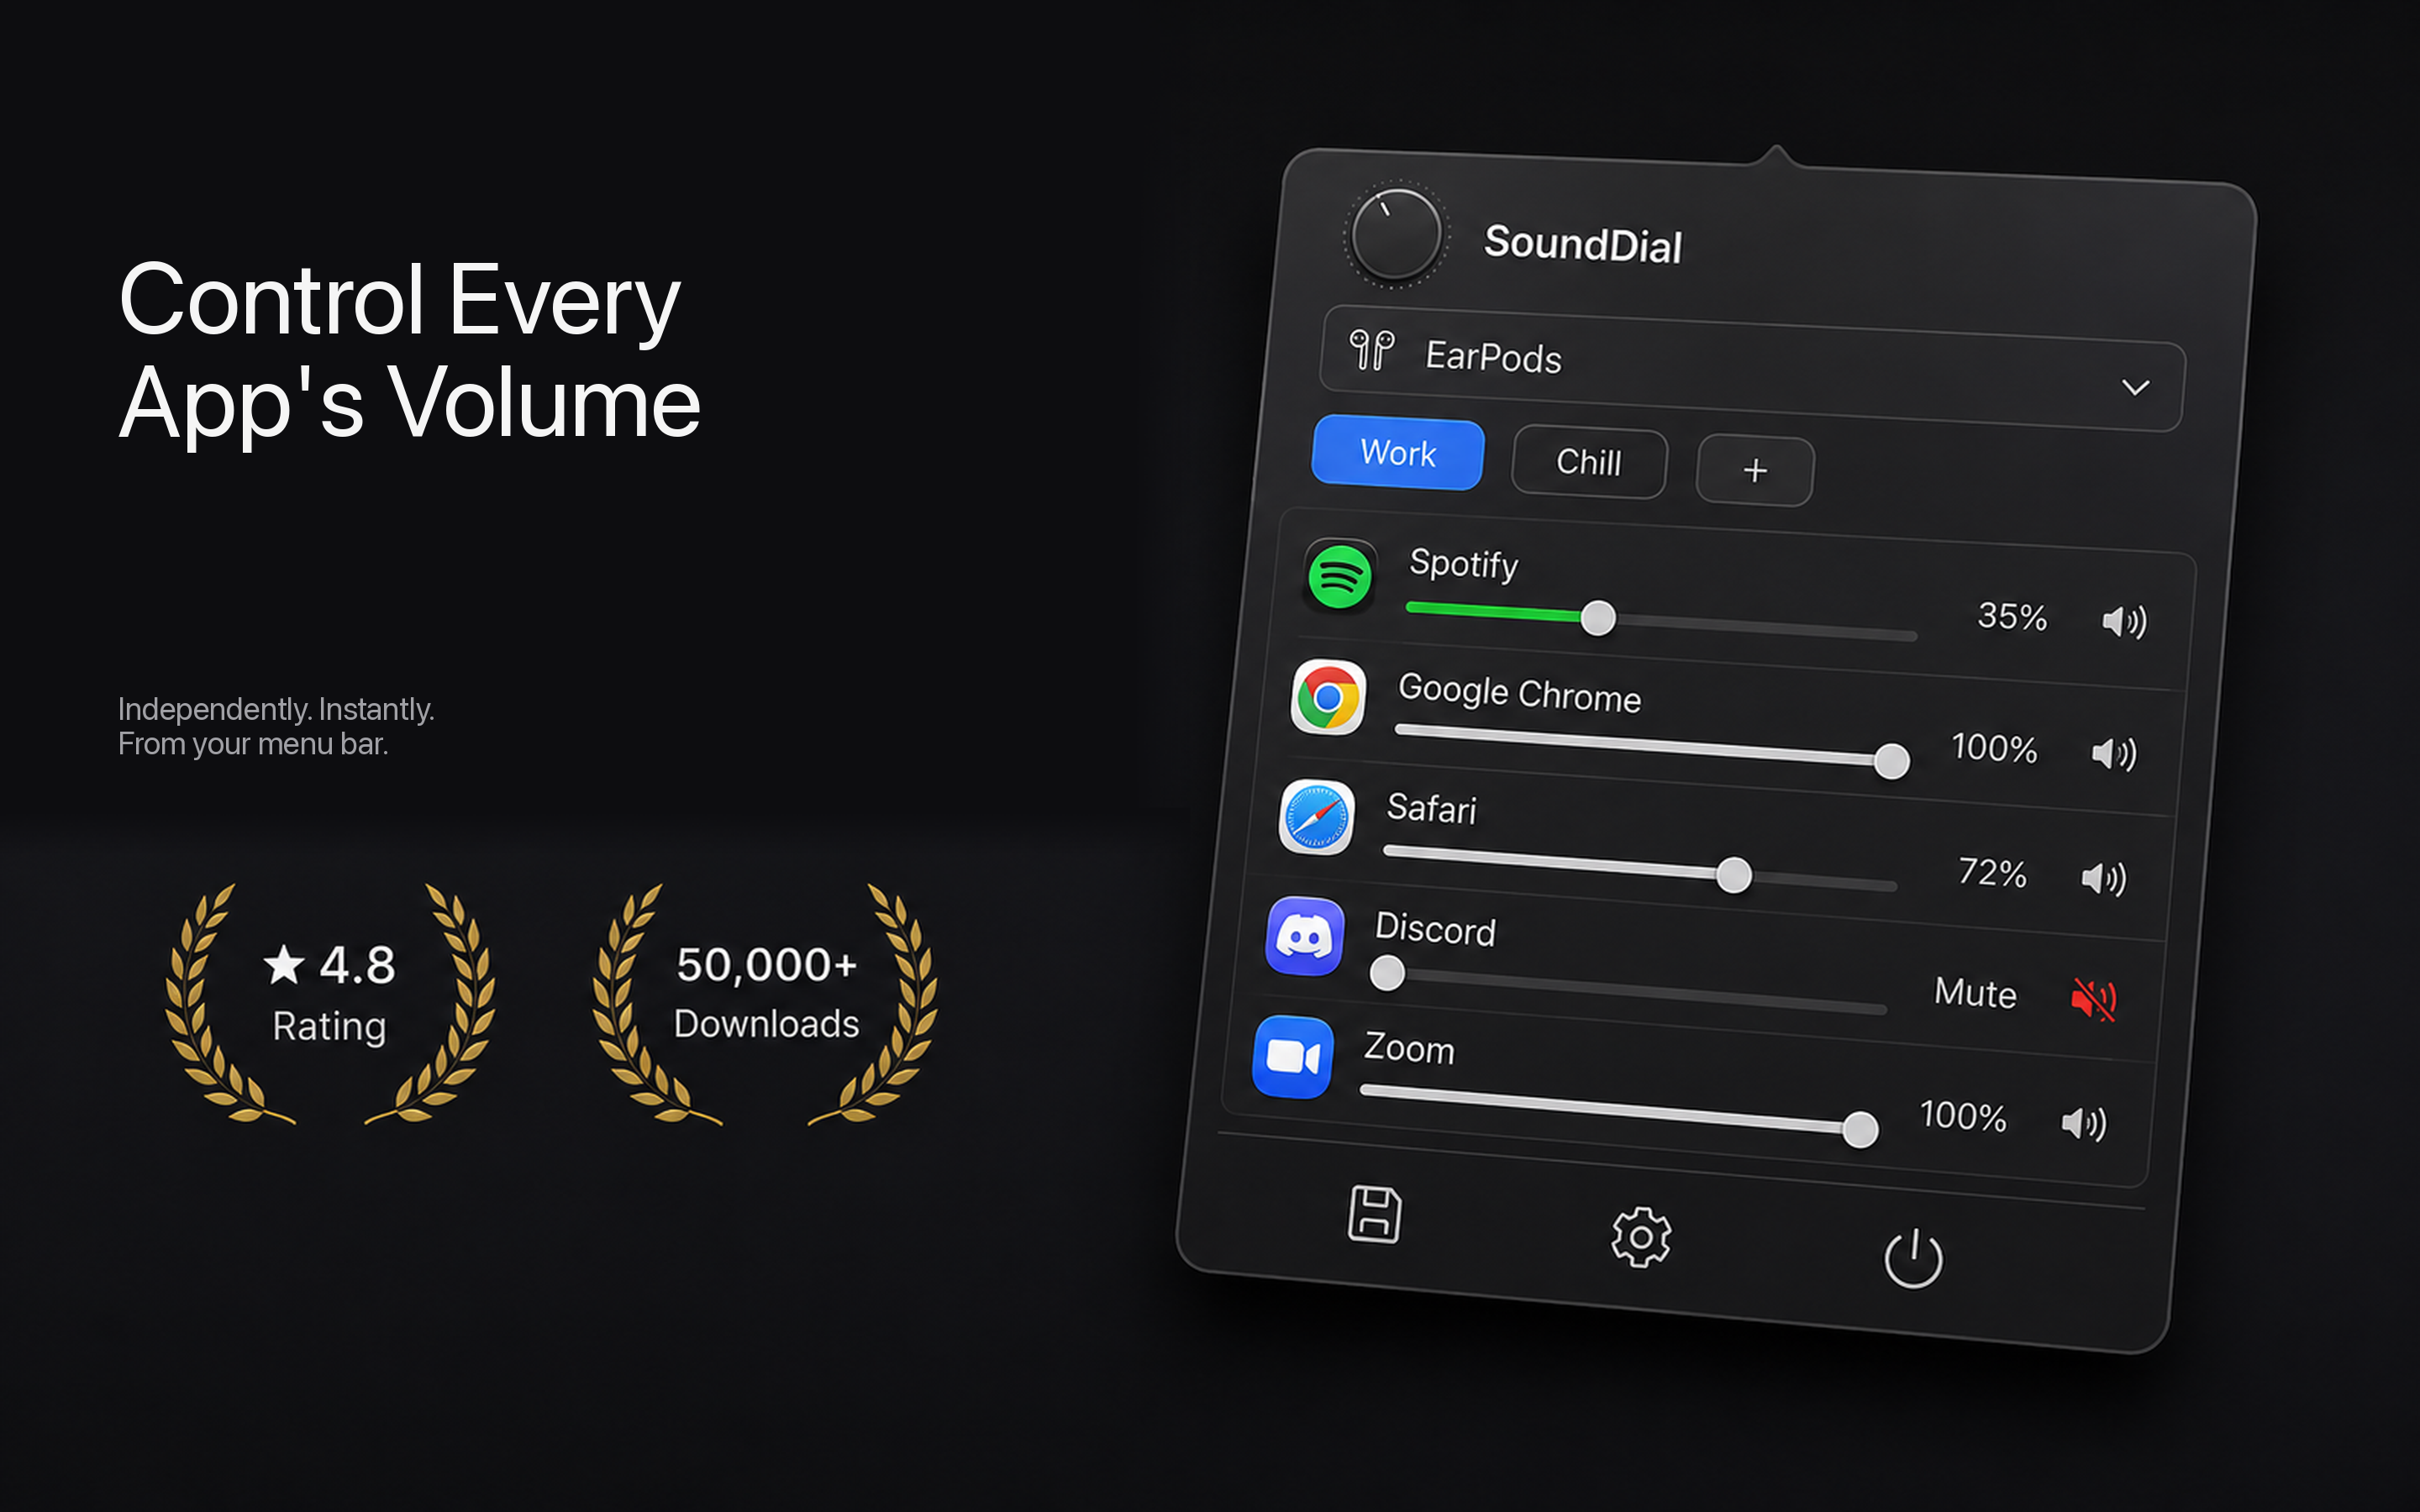
What are volume profiles?
A volume profile is a saved snapshot of every app's volume and mute state. You configure your apps how you want them — Spotify at 30%, Zoom at 100%, Slack muted — then save that as a named profile like "Work" or "Meeting." Later, you apply the profile and every app instantly jumps to its saved volume level.
Think of it like display presets for audio: just as you might have a display arrangement for "desk setup" vs "presentation mode," volume profiles let you switch between audio configurations without manually adjusting each app.
macOS doesn't have volume profiles
macOS has Focus modes (Do Not Disturb, Work, Personal, etc.) that control which notifications get through. But Focus modes don't control volume levels. They can suppress notification sounds entirely, but they can't set Spotify to 30% or Zoom to 100%. There's no built-in way to save and restore per-app volume configurations.
Setting up profiles with SoundDial
SoundDial includes a built-in profile system. Here's how to set it up:
Creating a profile
- Open SoundDial from the menu bar
- Adjust every app's volume to how you want it for a specific situation
- Click the "+" button in the profile section
- Give it a name (e.g., "Meeting") and choose an icon
- Done — your current volume configuration is saved
Switching profiles
Your saved profiles appear as buttons in SoundDial's popover. Click one and every app instantly switches to the volumes saved in that profile. One click replaces five or six manual adjustments.
Example profiles
Meeting
- Zoom / Teams: 100%
- Spotify: muted
- Slack: muted
- Browser: muted
Focus Work
- Spotify: 35%
- Slack: 10%
- Mail: muted
- Browser: 50%
Gaming
- Game: 60%
- Discord: 100%
- Spotify: 20%
- Everything else: muted
Chill
- Spotify: 70%
- Browser: 60%
- Notifications: 20%
Updating profiles
If your preferred volumes change over time, just adjust the sliders and update the profile. The next time you apply it, it uses the new settings.
Profiles + auto-ducking = fully automatic
Combine profiles with SoundDial's auto-ducking feature and you rarely need to touch volume at all. Apply your "Focus Work" profile in the morning. When a call comes in, auto-ducking lowers everything except the call app. When the call ends, everything returns to your profile levels. At the end of the day, switch to "Chill" with one click.
Get SoundDial on the Mac App Store — €14.99 one-time purchase, no subscription, macOS 14.2+.